In this tutorial, we will learn how the mapping between Member pages, Categories, and Membership levels work. So let’s get started!
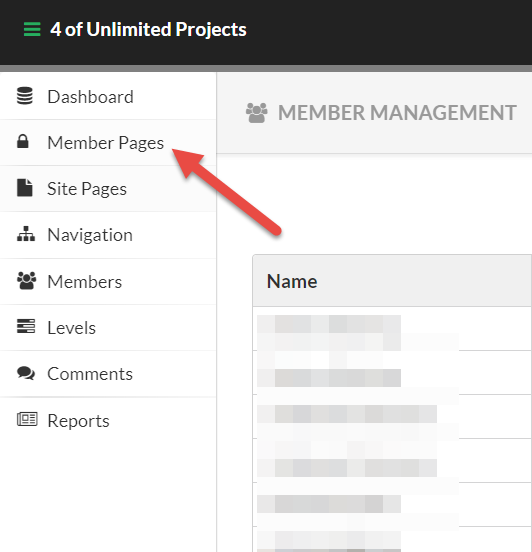
In the Project Dashboard, Click Member Pages. You will be re-directed to the Content Management screen as shown below:
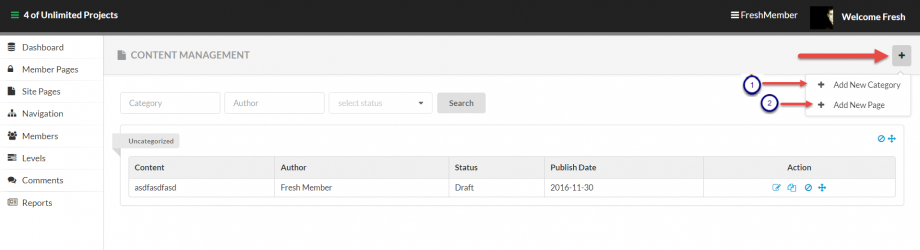
Content Management

Please follow the numbering in the screen above for detailed explanations.
1. Click the (+) icon as shown in the screen above to add content to the site. You will get the following two options:
– Add New Category
– Add New Page
2. Now let’s start with creating a new category.
What is a Category?
Category act as a container for the content. All the content is mapped to a particular category which is further mapped to the membership levels.
For Example – you start a membership course which contains a total of 5 modules. So the suggested first category could be named as Module 1, second category as Module 2 and so on.
Similarly, If your membership course is Week-based, you could name the categories as Week 1, Week 2 and so on.
Click Add New Category. A pop-up for the same will appear as shown below:
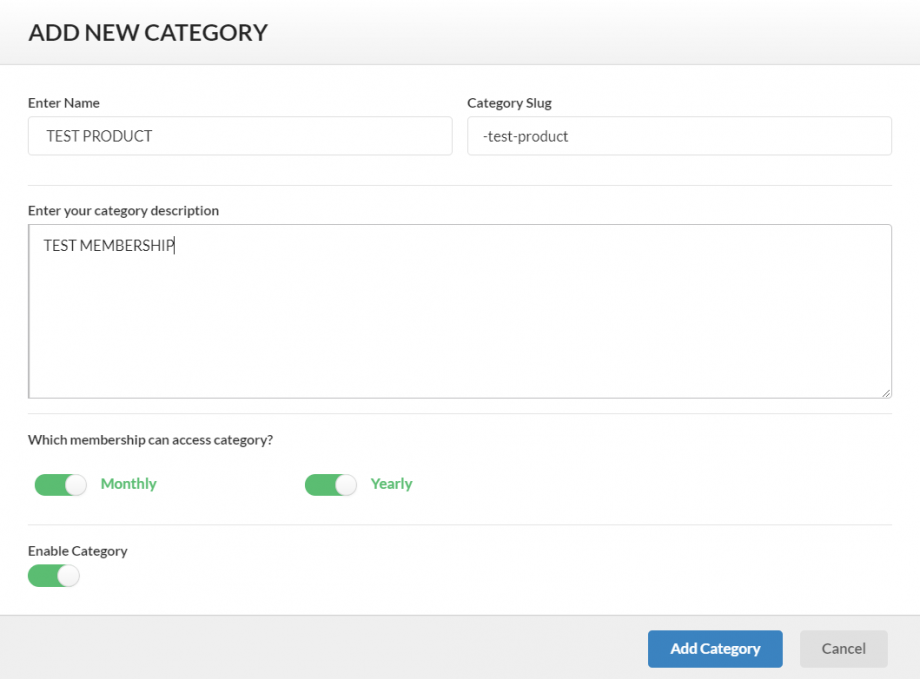
Add New Category

Categories hold the site content that can be accessed only by the paid members. Categories can be mapped to any number of membership levels. So, if your membership site has multiple membership levels, create one or more categories for each level as per your requirements.
We created two Membership levels- Yearly and Monthly (as appearing in the screen above)
In other words, if you want all the page content (explained ahead) in this category to be accessible in all membership levels, choose all the levels in the screen above.
Now, let’s move to see the mapping in the member pages and categories.
Click Add New Page in the Content Management section as shown below:
Add New Page
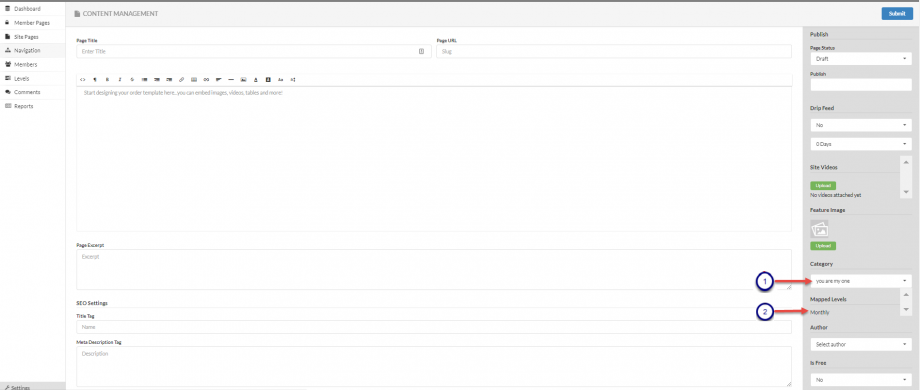
Please follow the numbering in the screen above for detailed explanations.
1. Category: The categories that you just created will show in the drop-down list in this field. Choose the Category with which you want to map the content of this page.
2. Mapped Levels: Once you select your choice of category, this section will by-default show the membership level with which the category is mapped. The example is shown in the next screen.

Please follow the numbering in the screen above for detailed explanations.
1. Mapped Levels: As you can see in the screen above, once a particular category is selected, the mapped membership level will be displayed by default.
Important Note:
– The content of a member page can only be mapped with one category at a time. So if you want this page content to be accessible for all the membership levels, map the category with all membership levels as well.
With this, we complete the tutorial for Mapping between Member pages, Categories and Membership levels.
For a detailed explanation on all the fields in this section – click How to create Content in Fresh Member
Leave A Comment?